In this tutorial, I am assuming that you have already created VPC with Public and Private subnets

In the above scenario, we’ll create a micro instance inside the public subnet with an IP 10.100.10.0/24, which will act as the gateway for all the instance(s) inside the private subnet (10.100.20.0/24).

Also, please create the separate Security Group for NAT instance:

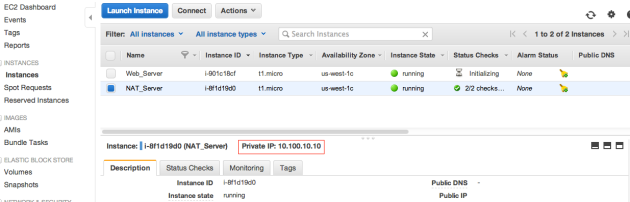
After the creation of the NAT instance, you will notice, that it doesn’t have Public IP:
To Fix this, select the Elastic IPs from the VPC console and click on “Allocate New Addresses“, select the VPC from “EIP used in” and click on “Yes,Allocate” :

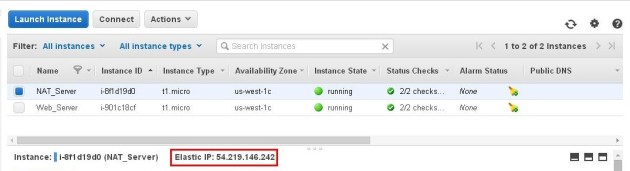
Assign the allocated Elastic IP to the NAT instance:

Now, NAT instance has also Public IP:
From the EC2 console right click on NAT instance and select “Change Source / Dest. Check”:

Click on “Yes,Disable”

Connect to the NAT instance using terminal emulation software (i.e. putty), and allow the ip forwarding on it:

Uncomment the following line:
net.ipv4.ip_forward=1
 Note: Please reboot the machine after enabling the ip forwarding or run this command “sysctl -p”
Issue the Iptables command for MASQUERADE:
iptables -t nat -A POSTROUTING -o eth0 -s 10.100.20.0/24 -j MASQUERADE
 Note: Please adjust your Subnet in above iptables command.
Modify the NAT instance security group to allow all or desired inbound traffic from private subnet (In my case, 10.100.20.0/24) or desired server.

Create a custom route, associate your private subnet(s) to it and make a default route to use the NAT instance as a gateway:


Testing from Server inside the Private Subnet:


Edit the /etc/rc.local file:
vi /etc/rc.local
Add following to the rc.local before “exit 0“, so that, MASQUERADE will automatically enable at boot time:
iptables -t nat -A POSTROUTING -o eth0 -s 10.100.20.0/24 -j MASQUERADE

No comments :
Post a Comment