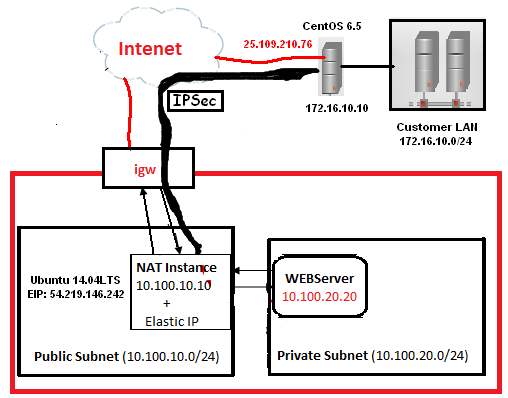
In this tutorial, we will use the previous scenario on AWS side for the creation of site-to-site vpn between AWS VPC and Local site. On Amazon side, we’ll use Ubuntu 14.04 LTS, which will act as gateway for private subnet(s) plus the vpn gateway, while on the Local site, we’ll use the CentOS 6.5, which will perform the same tasks as of Ubuntu on AWS side (gateway for LAN plus vpn gateway).
Note: Please don’t waste your time in hacking, all these public devices and IP(s) are Temporary, I have destroyed them after finished this tutorial.
VPN Configuration on AWS VPC:
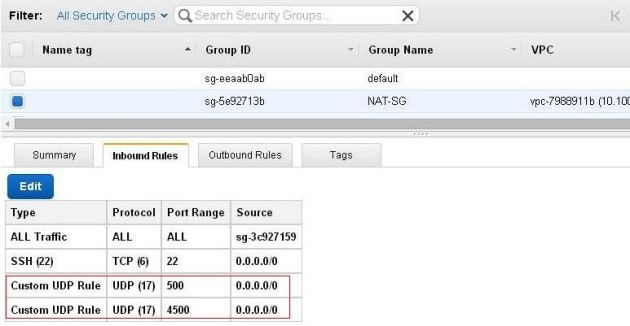
Please add the udp ports 500 & 4500 on NAT instance security group:
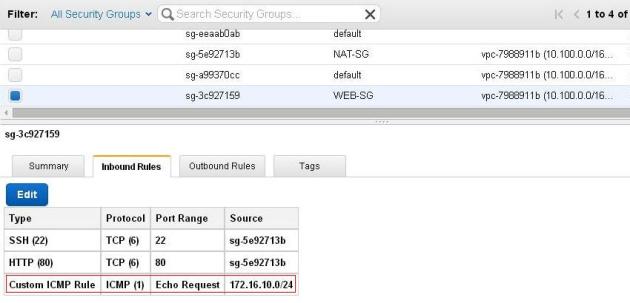
Also allow the ICMP packet on internal subnet security group from the remote LAN for testing purpose:
Now, install the desired package(s) for ipsec:
apt-get install iptables openswan

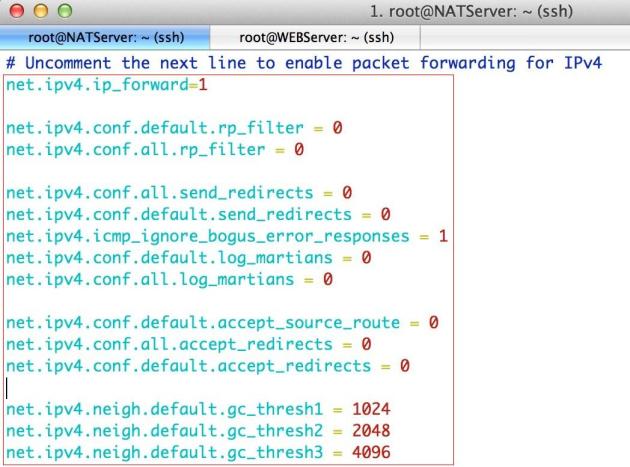
Edit the sysctl.conf file:
vi /etc/sysctl.conf

Add the following parameters inside it:
net.ipv4.ip_forward=1

net.ipv4.conf.default.rp_filter = 0
net.ipv4.conf.all.rp_filter = 0

net.ipv4.conf.all.send_redirects = 0
net.ipv4.conf.default.send_redirects = 0
net.ipv4.icmp_ignore_bogus_error_responses = 1
net.ipv4.conf.default.log_martians = 0
net.ipv4.conf.all.log_martians = 0

net.ipv4.conf.default.accept_source_route = 0
net.ipv4.conf.all.accept_redirects = 0
net.ipv4.conf.default.accept_redirects = 0

net.ipv4.neigh.default.gc_thresh1 = 1024
net.ipv4.neigh.default.gc_thresh2 = 2048
net.ipv4.neigh.default.gc_thresh3 = 4096
Modify the rc.local file:
vi /etc/rc.local

Modify the MASQUERADE rule that we had added in the previous tutorial (Please adjust it according to your scenario):
iptables -t nat -A POSTROUTING -s 10.100.0.0/16 ! -d 172.16.10.0/24 -o
eth0 -j MASQUERADE

Note: Please Reboot your machine once, so that changes will take effect.
Edit the ipsec.conf file:
vi /etc/ipsec.conf

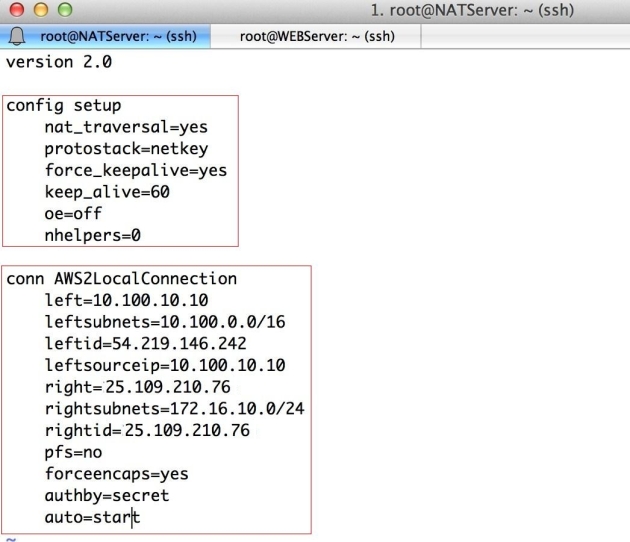
Here is mine working ipsec.conf file, please adjust your’s as per your requirement:
version 2.0

config setup
 nat_traversal=yes
 protostack=netkey
 force_keepalive=yes
 keep_alive=60
 oe=off
 nhelpers=0

conn AWS2LocalConnection
 left=10.100.10.10
 leftsubnets=10.100.0.0/16
 leftid=54.219.146.242
 leftsourceip=10.100.10.10
 right=25.109.210.76
 rightsubnets=172.16.10.0/24
 rightid=25.109.210.76
 pfs=no
 forceencaps=yes
 authby=secret
 auto=start
Edit the shared secret file:
vi /etc/ipsec.secrets

Mine ipsec.secrets file as an example:

VPN Configuration on Local Site:
Before beginning the configuration, please verify that the selinux is disabled:
sestatus

Install the openswan on CentOS, along with the desired packages:
yum install wget bind-utils openswan lsof

Configure the Openswan to start at boot time:
chkconfig ipsec on

Edit the sysctl.conf file on CentOS:
vi /etc/sysctl.conf

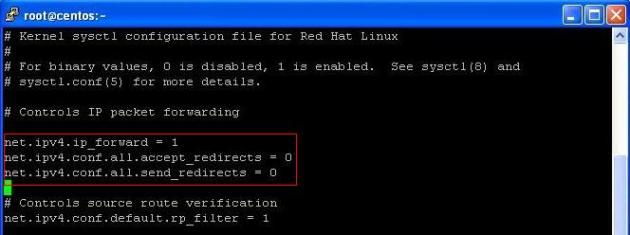
Add/Edit the following parameters:
net.ipv4.ip_forward = 1
net.ipv4.conf.all.accept_redirects = 0
net.ipv4.conf.all.send_redirects = 0
Edit the iptables rule file:
vi /etc/sysconfig/iptables

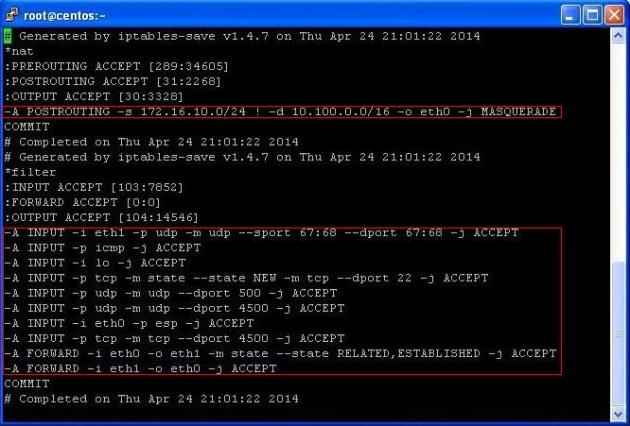
Modify your iptables file according to your scenario, here are the desired iptables rules, please adjust them accordingly:
*nat
:PREROUTING ACCEPT [0:0]
:POSTROUTING ACCEPT [0:0]
:OUTPUT ACCEPT [0:0]
-A POSTROUTING -s 172.16.10.0/24 ! -d 10.100.0.0/16 -o eth0 -j MASQUERADE
COMMIT
###########
*filter
:INPUT ACCEPT [0:0]
:FORWARD ACCEPT [0:0]
:OUTPUT ACCEPT [0:0]
-A INPUT -i eth1 -p udp -m udp --sport 67:68 --dport 67:68 -j ACCEPT
-A INPUT -p icmp -j ACCEPT
-A INPUT -i lo -j ACCEPT
-A INPUT -p tcp -m state --state NEW -m tcp --dport 22 -j ACCEPT
-A INPUT -p udp -m udp --dport 500 -j ACCEPT
-A INPUT -p udp -m udp --dport 4500 -j ACCEPT
-A INPUT -i eth0 -p esp -j ACCEPT
-A INPUT -p tcp -m tcp --dport 4500 -j ACCEPT
-A FORWARD -i eth0 -o eth1 -m state --state RELATED,ESTABLISHED -j ACCEPT
-A FORWARD -i eth1 -o eth0 -j ACCEPT
COMMIT
 Note: Please Reboot your machine once, so that changes will take effect.
Edit the ipsec.conf file:
vi /etc/ipsec.conf

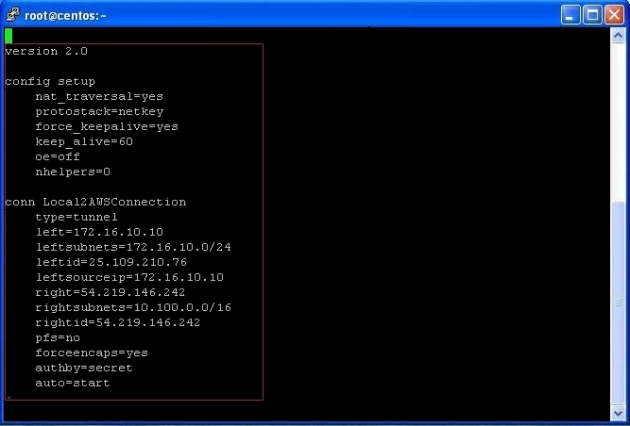
Here is mine working ipsec.conf file on Local site, please adjust your’s as per your requirement:
version 2.0

config setup
 nat_traversal=yes
 protostack=netkey
 force_keepalive=yes
 keep_alive=60
 oe=off
 nhelpers=0

conn Local2AWSConnection
 type=tunnel
 left=172.16.10.10
 leftsubnets=172.16.10.0/24
 leftid=25.109.210.76
 leftsourceip=172.16.10.10
 right=54.219.146.242
 rightsubnets=10.100.0.0/16
 rightid=54.219.146.242
 pfs=no
 forceencaps=yes
 authby=secret
 auto=start
Edit the shared secret file:
vi /etc/ipsec.secrets

Mine ipsec.secrets file as an example on Local Site:

Restart the IPSec Service & verify its status on both Sides:
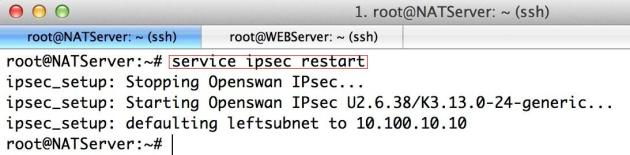
Restart the IPSec service on Ubuntu at AWS VPC:
service ipsec restart
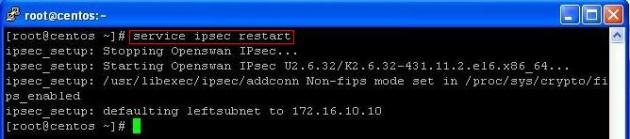
Restart the IPSec service on CentOS at Local Site:
service ipsec restart
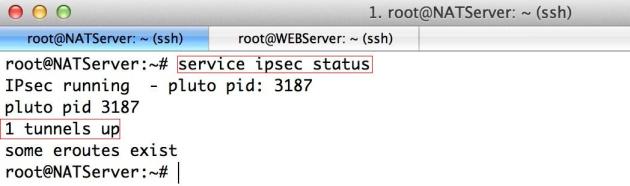
Verify the status of IPSec service on Ubuntu at AWS VPC:
service ipsec status
Verify the status of IPSec service on CentOS at Local Site:
service ipsec status

Verify the IPSec Tunnel status on both servers:
ipsec whack --status | grep -i established

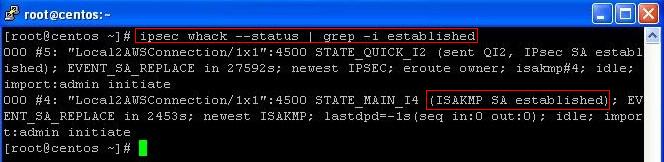 Note: established means that tunnel is up and traffic will traverse through it
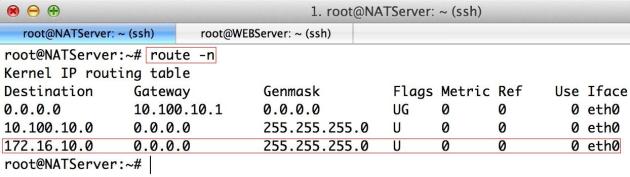
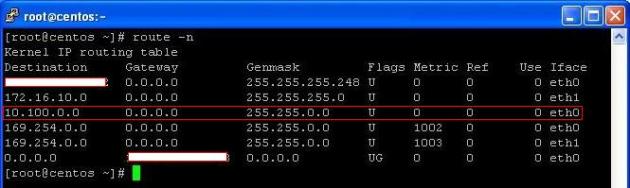
Verify the Route Table on both servers:
route -n
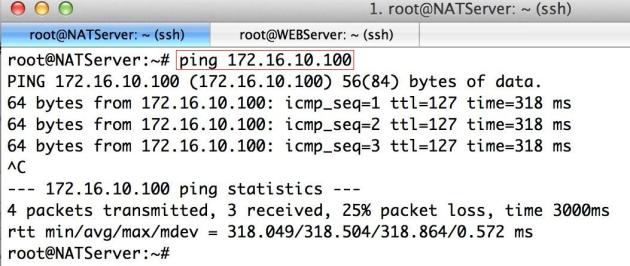
Verify that the Traffic is passing through the Tunnel:
Ping from the AWS vpn gateway to the machine on Local LAN (I have Win XP machine on local LAN with an ip 172.16.10.100).
Ping from AWS VPC private Subnet to Local LAN for verification:
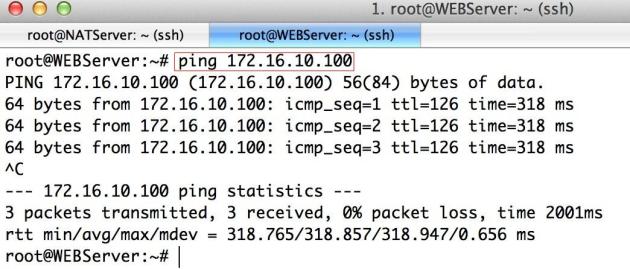
Ping from the Local vpn gateway to the machine on VPC Private subnet (I have Webserver on private subnet with an ip 10.100.20.20).

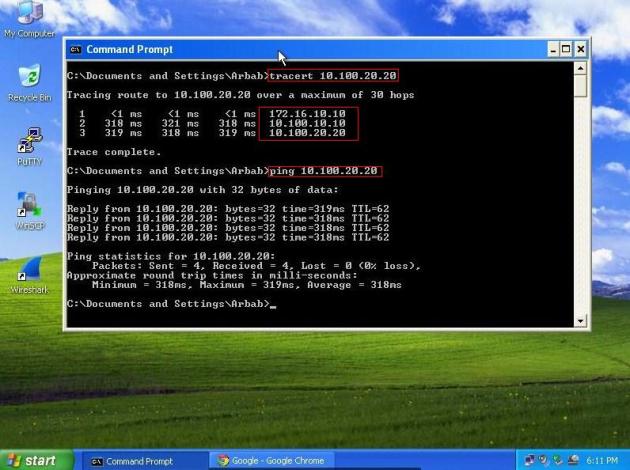
Ping from Local LAN to AWS VPC private Subnet for verification:
Testing Without Ping (Using the following reference)
If you don’t have a box to target that should respond to ping, you can try running a port scan to see if you can at least reach the machine.
# nmap -PN
Monitoring traffic
While you’re running your ping or nmap, you can view the traffic with tcpdump.
# tcpdump -n host
If you don’t see ESP packets in tcpdump, then they aren’t being tunneled. Try:
# tcpdump -n host
If that shows ICMP (or other if using nmap) packets, then you’re sending packets around the tunnel.
VERY Useful Tip:
If the Tunnel didn’t come up after the configuration, just restart the server and also start the ping from your LAN host to other side LAN host.
References:
No comments :
Post a Comment